
SmartDraw Floor Plan Notation is a simple, text-based format for describing rooms and buildings using a sequence of measurements. You can write it by hand using your own notes measuring your space and import it into SmartDraw to generate a complete, editable floor plan.
How Floor Plan Notation Works
Think of Floor Plan Notation as walking the perimeter of a room. Start with one wall, record its measurement, and then turn to the next. Continue wall by wall until you return to your starting point.
Each line represents one wall and begins with Right or Left to show which way you turned. Keep moving around the room in one direction until the outline is complete.
You can also include any doors, windows, or openings along the wall. Then attach rooms to each other.
If you can walk around a room and write down its measurements, you can describe it using Floor Plan Notation.
- Choose a wall as your starting point.
- Record its measurement.
- Turn right or left to face the next wall.
- Enter that wall on a new line, beginning with the direction you turned.
- Continue around the room until you return to the starting point.
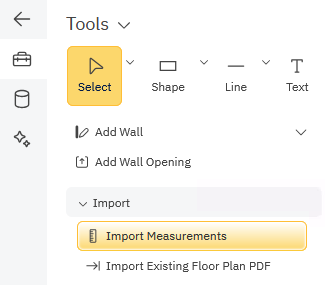
When you're ready you can import measurements in the SmartPanel of any floor plan template using the Import Measurements button.
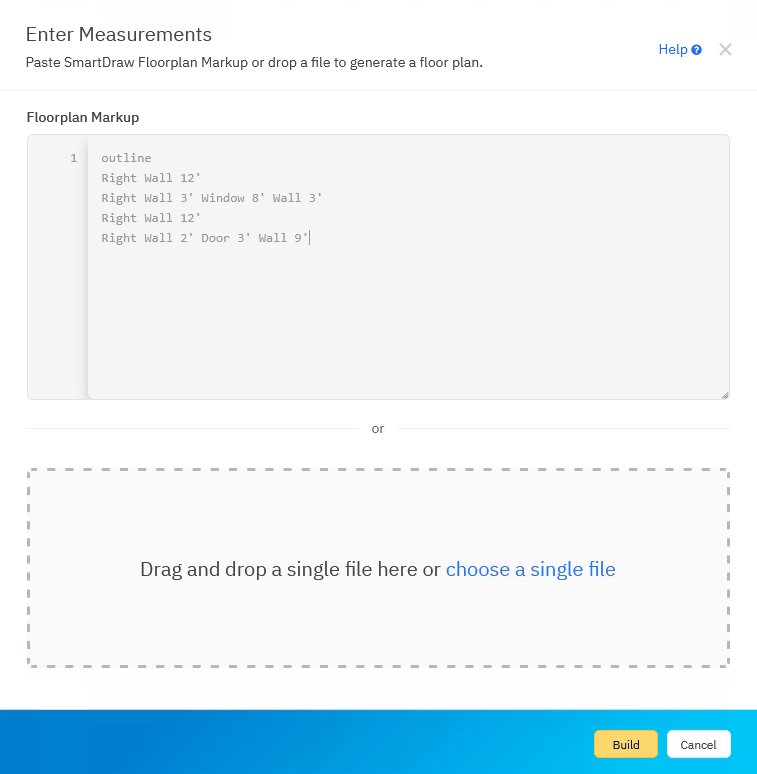
Then copy-paste your Floor Plan Notation in the dialog that appears.
Core Concepts
Outline. A connected series of walls that form one closed room or building shape. A floor plan is one or more outlines.
Section. A single straight run of basic features: a wall with doors, windows, and gaps. Every section begins with the word Right or Left.
Point. A named location along an outline, used as the origin for another outline to create a complete building.
Outline
Defines the starting point, orientation, and default wall thickness for an outline.
outline originx 10' originy 10' corner topleft thickness 4"
| Parameter | Description |
originx |
X coordinate of the starting corner on the drawing area. |
originy |
Y coordinate of the starting corner. |
corner |
Which corner the origin represents. Determines the direction of the first section. |
thickness |
Default wall thickness. |
All parameters have defaults. This means you can have outline on a line by itself.
The corner value determines the direction the first Right section runs:
corner value |
First Right section runs |
topleft |
Horizontally, left to right |
topright |
Vertically, top to bottom |
bottomright |
Horizontally, right to left |
bottomleft |
Vertically, bottom to top |
Section
Begins with Right (clockwise turn from the previous section) or Left (counter-clockwise turn). A section is a sequence of feature words, each followed by a length in real-world units.
Below is a 20-foot wall containing a 3-foot door and a 6-foot window. Notice how the wall is divided into sections that show the distance between each feature.
Right Wall 5' Door 3' Wall 4' Window 6' Wall 2'
Sections turn 90 degrees by default. You can also specify different angles, covered later below.
Feature Words
A section is a series of features: wall, door, window, or gap. Below you'll find a definition for each.
| Word | Description |
Wall |
A plain wall segment. |
Door |
A door. Variants include PocketDoor and DoubleDoor. |
Window |
A window. Specific window types are supported. |
Gap |
An open span (no wall, no door, no window). |
Lengths are written with imperial units (12', 4' 9 5/8") or metric units. Spaces separate the feature word from its length and from the next feature.
Point
A point is a named position along the outline that be used as the origin connecting another outline statement. Points are how you connect rooms to each other to create a complete floor plan.
Right Wall 20' Point Bathroom
The point name (Bathroom above) can then be referenced by another outline:
outline originx Bathroom corner topright
Non-Right-Angle Walls
By default, each new section turns 90 degrees from the end of the previous section. To use a different angle, add Angle <degrees> at the start of the section:
Right Wall 12' Right Angle 120 Wall 7' Window 8' Wall 4' 9 5/8" Right Angle 60 Wall 20' 1 11/16" Right Wall 2' Door 3' Wall 9'
The angle is measured from the end of the previous section.
Units
SmartDraw Floor Plan Notation works with both imperial and metric units, but don't mix and match units in the same outline.
| Format | Example |
| Feet | 12' |
| Feet and inches | 12' 6" |
| Feet, inches, and fractions | 4' 9 5/8" |
| Meters | 3.5m |
| Millimeters | 1200mm |
Let's Walk Through Some Examples
Below are some examples that will help you take the above concepts and build a simple room, a room with doors and windows, and non-rectangular room, and two rooms attached to each other.
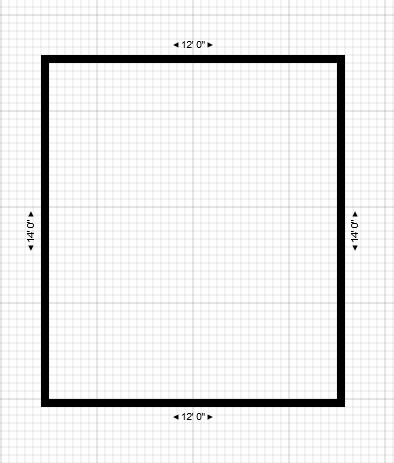
A Simple Room
outline
Right Wall 12'
Right Wall 14'
Right Wall 12'
Right Wall 14'
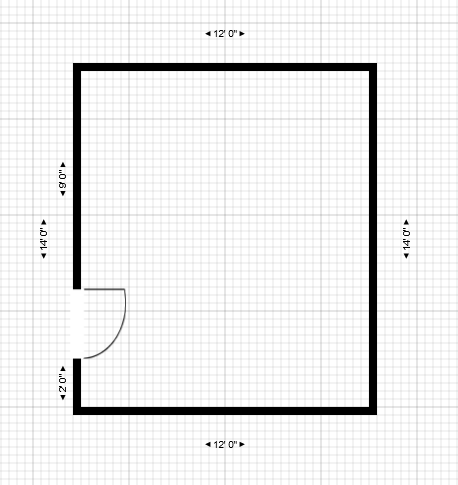
A Simple Room with a Door
outline
Right Wall 12'
Right Wall 14'
Right Wall 12'
Right Wall 2' Door 3' Wall 9'
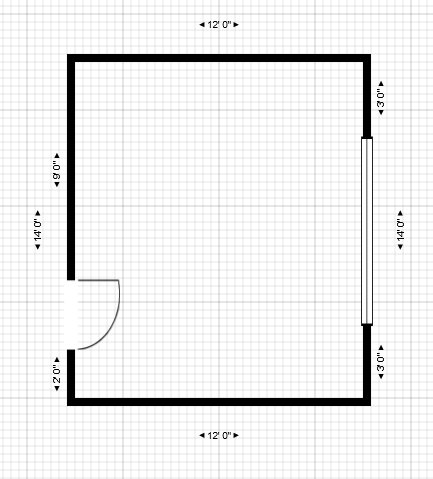
A Simple Room with Doors and Windows
outline
Right Wall 12'
Right Wall 3' Window 8' Wall 3'
Right Wall 12'
Right Wall 2' Door 3' Wall 9'
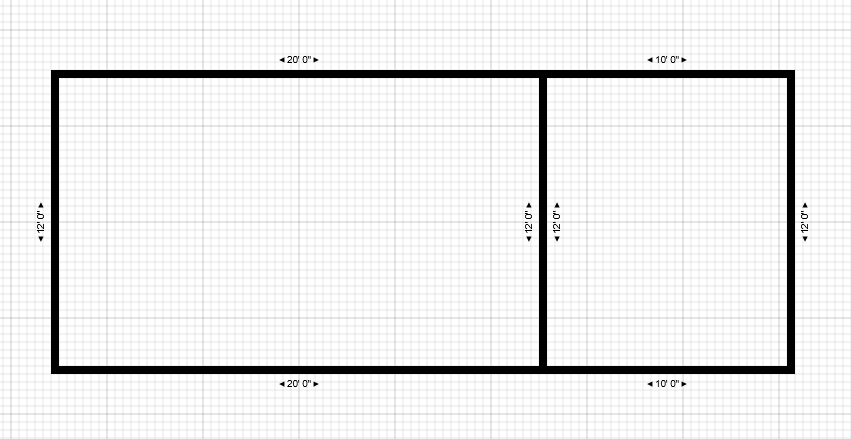
Two Outlines Attached Using a Point
outline
Right Wall 20' Point Bathroom
Right Wall 12'
Right Wall 20'
Right Wall 12'
outline originx Bathroom corner topleft
Right Wall 10'
Right Wall 12'
Right Wall 10'
Right Wall 12'
Dealing with Common Walls
When two rooms are next to each other like in the above example, define their shared wall as part of both room outlines. This keeps each room complete and closed while aligning the two outlines along the same edge.
Because each room remains a separate, closed shape, you can move, resize, or restyle it in SmartDraw without creating a gap in the neighboring room.
While a shared wall is drawn twice, any shared doors or windows, should only be defined once. Pick the second outline to add the door to so it appears on top of the walls.
outline
Right Wall 20' Point Bathroom
Right Wall 12'
Right Wall 20'
Right Wall 12'
outline originx Bathroom corner topleft
Right Wall 10'
Right Wall 12'
Right Wall 10'
Right Wall 3' Door 3' Wall 6'
A More Complex Example
Here's a room with windows, a bathroom, and a closet.
outline
Right Wall 12'
Left Wall 2'
Right Wall 5' Window 6' Wall 5'
Right Wall 20' Point Bathroom
Right Wall 3' Door 3' Wall 4' PocketDoor 5' Wall 4' DoubleDoor 6' Wall 3'
Right Wall 18'
outline originx Bathroom corner topright
Right Wall 12'
Right Wall 10'
Right Wall 6' Point Closet Wall 6'
outline originx Closet corner bottomright
Right Wall 8'
Right Wall 6'
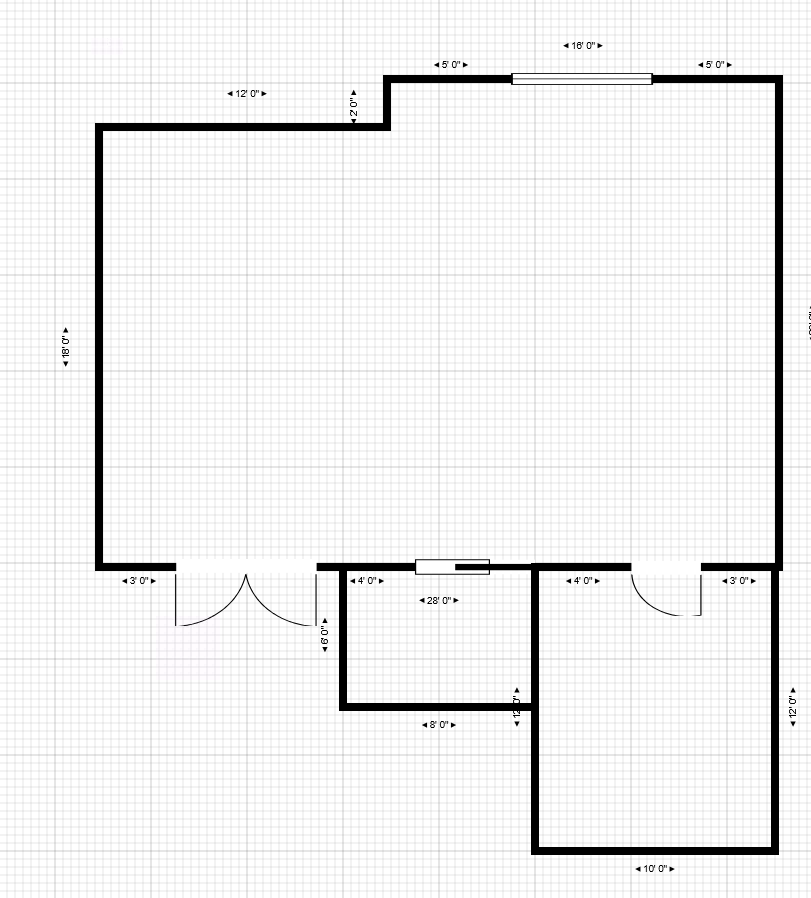
You can keep attaching outlines to build a complete floor plan.
Any floor plan generated this way is fully editable in SmartDraw using all the usual floor plan tools. You can add furniture, move walls, add doors or windows as needed.